Tuesday, April 30, 2024

Mastering Go: Part 4 - Concurrency in Go

Concurrency in Go

Concurrency is the capability to execute multiple tasks simultaneously. Due to the demand for efficient and high-speed processing with multicore processors, 'Go' was developed to facilitate concurrent programming. By leveraging Go subroutines and channels, we can write concurrent programs in Go.

Goroutines

A Goroutine is a thread managed by the Go runtime. When a function is invoked with the 'go' keyword prefix, a new Goroutine will be initiated.

Channels

A channel serves as the communication medium between two Goroutines. It's a type that facilitates the transmission and reception of values. By utilizing channels, Goroutines can synchronize without the need for explicit locking mechanisms. Since Goroutines do not return values directly, channels are employed to retrieve results from Goroutine executions.

ch := make(chan string)// Create channel
ch <- stringData // send data to the channel
stringVariable := <-ch // receive data from channel 

Buffered Channel

We can specify the buffer length to initialize a buffered channel.

ch := make(chan string, 2)

In the buffered channel above, we cannot have more than 2 values.

Close channel

The goroutine can close the channel if there are no more values to pass to the process that invoked the goroutine. Similarly, the goroutine invoker can check whether the channel has been closed or not after receiving the final value.

stringVariable, channelStatus := <-ch

Here, the variable channelStatus will contain the status of the channel. If the channel is closed, channelStatus will be false.

Select

The select statement lets a goroutine wait on multiple communication operations.

Mutex

This assures only one goroutine can access a variable at a time to avoid conflict and will be used by locking and unlocking the block of code.

Exercise

Exercise- Continue the exercise from the last part of this learning series
Mastering Go: Part 3 - Programming paradigm(OOP and procedural)
 
Step 1: Modify the signature of the formatString function to add one more parameter of type chan to receive the channel type variable.

Step 2: Modify the main method and create a new variable of chan type.

Step 3: Call the formatString function for PersonName and Address struct types prefixed with the 'go' keyword.

Update the main method with the following code, and observe the modifications made to the signature of the function formatString and how it is called from the main method:

package main

import (
"fmt"
dateformater "learngo/date_formater" // import data formater package
stringformater "learngo/string_formater" // import string formater package
)

func main() {

fmt.Println("Crete new date instance using a constructor!")
dateConstructor := dateformater.NewDate("2021", "07", "01")
fmt.Println(dateConstructor.Format())

// Create a channel to communicate and receive data between goroutines
ch := make(chan string)

fmt.Println("Use name format package to format name!")
// Create the instance of PersonName struct
personName := &stringformater.PersonName{FirstName: "Sharad", LastName: "Subedi"}
go formatString(personName, ch)
formatedName := <-ch // receive formatted data from channel
fmt.Println(formatedName)

fmt.Println("Use name format package to format billing address!")
//create the instance of the Address struct
address := &stringformater.Address{StreetNumber: "123", StreetName: "Main St", City: "San Francisco", State: "CA", Zip: "94101"}
go formatString(address, ch)
formatedAddress, channelStatus := <-ch // receive formatted data from channel with channel status
fmt.Println(formatedAddress)

// Check the status of the channel
if channelStatus {
fmt.Println("Channel Ch is not closed! The last value is %s", formatedAddress)
} else {
fmt.Println("Channel Ch is closed! The last value received from channel is %s", formatedAddress)
}

}

// function to format the strings. Takes the interface type as input.
// Example to implement polymorphism using interface
func formatString(formater stringformater.Formater, ch chan string) {
ch <- formater.Format()
}


Reference

https://go.dev/tour/concurrency/2

Sunday, April 28, 2024

Mastering Go: Part 3 - Programming paradigm(OOP and procedural)


GO programming paradigm

Go mostly follows the procedural language paradigm and supports coding following the OOP concept, utilizing types and methods, even though Go is not a pure OOP language. Go doesn't provide a type hierarchy like pure OOP languages to create objects. Since it supports multiple programming paradigms, it is often referred to as a post-OOP or concurrent programming language.

Interfaces

Go doesn’t have the concept of classes and inheritance. Instead, it uses interface types to define method signatures for common types. The 'interface' keyword is utilized to create an interface.

type interface_name interface {
// method signatures
}

To implement an interface, all methods of the interface type must be implemented in the derived type. In Go, interfaces are implemented implicitly, unlike in languages such as C# and Java.
For example, let's continue the exercise from Part 2 of this series Mastering Go: Part 2 - Structuring Your Go Projects
Step 1. Create a new file named formatter.go in the string_formatter package and add the following code:
package stringformater

// formater interface to format the strings
type Formater interface {
Format() string
}

Step 2. Update the main function and add the following code:

package main

import (
"fmt"
dateformater "learngo/date_formater" // import data formater package
stringformater "learngo/string_formater" // import string formater package
)

func main() {

fmt.Println("Import date format package!")
dateformater := dateformater.Date{Year: "2021", Month: "07", Day: "01"}
fmt.Println(dateformater.Format())

//Create an instance of an interface 'Formater'
var istringFormater stringformater.Formater

fmt.Println("Use name format package to format name!")
// Create the instance if PersonName struct and assign to string formater interface
istringFormater = &stringformater.PersonName{FirstName: "Sharad", LastName: "Subedi"}
fmt.Println(istringFormater.Format())

fmt.Println("Use name format package to format billing address!")
//create the instance if Address struct and assign to string formater interface
istringFormater = &stringformater.Address{StreetNumber: "123", StreetName: "Main St", City: "San Francisco", State: "CA", Zip: "94101"}
fmt.Println(istringFormater.Format())

}


In the above code, both the PersonName and Address structs implement all the methods defined in the Formatter interface. Since the interface type (Formatter) and the types (PersonName and Address) implement the interface in the same package (string_formatter), the interface is implicitly implemented for these types.

Go supports an empty interface, which is an interface with zero methods. This means that all types implicitly implement this interface.
Additionally, Go allows the use of multiple interfaces. One interface can implement another interface as well.

Polymorphism

In Go, there is no concept of classes and objects. Instead, we utilize Go interfaces to achieve polymorphism. When we create a variable of an interface type in Go, it can hold any other types that implement the interface. This feature allows us to achieve polymorphism effectively.

Example: Continue the exercise from the previous step (interface).

Step 1. Modify the main method and add the function formatString with the parameter as the interface type.
Step 2. Call the function formatString for PersonName and Address struct types.
Update the main method with the code below and observe the function formatString and its uses.

package main

import (
"fmt"
dateformater "learngo/date_formater" // import data formater package
stringformater "learngo/string_formater" // import string formater package
)

func main() {

fmt.Println("Import date format package!")
dateformater := dateformater.Date{Year: "2021", Month: "07", Day: "01"}
fmt.Println(dateformater.Format())

fmt.Println("Use name format package to format name!")
// Create the instance of PersonName struct
personName := &stringformater.PersonName{FirstName: "Sharad", LastName: "Subedi"}
fmt.Println(formatString(personName))

fmt.Println("Use name format package to format billing address!")
//create the instance of Address struct
address := &stringformater.Address{StreetNumber: "123", StreetName: "Main St", City: "San Francisco", State: "CA", Zip: "94101"}
fmt.Println(formatString(address))
}

// function to format the strings. Takes the interface type as input.
// Example to implement polymorphism using interface
func formatString(formater stringformater.Formater) string {

return formater.Format()
}


Encapsulation

In Go, structs and methods are utilized to encapsulate data. If the properties and/or methods of a struct begin with a capital letter, they are considered public and accessible from outside the package. Conversely, if they start with a lowercase letter, they are considered private and accessible only within the same package.

Constructor

Declare a function to do some initialization or validity check for the type. the constructor will always execute if the method from the type is accessed.  

Example: Continuing from the previous section(Polymorphism)

Step 1. Modify the date_formater file and add a new constructor to the struct Date. Copy the code below:
package dateformater

type Date struct {
Year string
Month string
Day string
}

func NewDate(year string, month string, day string) *Date {
return &Date{
Year: year,
Month: month,
Day: day,
}

}

func (d *Date) Format() string {
return d.Month + "/" + d.Day + "/" + d.Year
}


In the above code, the constructor simply returns an instance of the Date struct type.
Step 2. Modify the main.go file and create a new instance of the Date struct using its constructor. Copy the code below:

package main

import (
"fmt"
dateformater "learngo/date_formater" // import data formater package
stringformater "learngo/string_formater" // import string formater package
)

func main() {

fmt.Println("Crete new date struct type instance using a constructor!")
dateConstructor := dateformater.NewDate("2021", "07", "01")
fmt.Println(dateConstructor.Format())

// fmt.Println("Create the instance of Date using!")
// dateformater := dateformater.Date{Year: dateConstructor.Year, Month: dateConstructor.Month, Day: dateConstructor.Day}
// fmt.Println(dateformater.Format())

fmt.Println("Use name format package to format name!")
// Create the instance of PersonName struct
personName := &stringformater.PersonName{FirstName: "Sharad", LastName: "Subedi"}
fmt.Println(formatString(personName))

fmt.Println("Use name format package to format billing address!")
//create the instance of Address struct
address := &stringformater.Address{StreetNumber: "123", StreetName: "Main St", City: "San Francisco", State: "CA", Zip: "94101"}
fmt.Println(formatString(address))
}

// function to format the strings. Takes the interface type as input.
// Example to implement polymorphism using interface
func formatString(formater stringformater.Formater) string {

return formater.Format()
}


Reference

https://go.dev/learn/

Friday, April 26, 2024

Mastering Go: Part 2 - Structuring Your Go Projects

Structuring Go projects/code

Like other programming languages, Go has its own approach to organizing code.

Package

The smallest unit for organizing code in Go is a package. A package is constructed from one or multiple source files, each containing distinct functionality for easy maintenance. 

Each source file begins with a 'package' clause to encapsulate the code within the package. Compiled packages can be imported into other package's source code for code reuse. 

The 'main' package serves as the entry point for program execution."

Example:  Continue the exercise from part 1 of this series Mastering Go: Part 1 - Getting Familiar

The following example demonstrates how to format dates using the 'dateformater' package and format person names and addresses using the 'stringformater' package.

Step 1: Create a folder named 'date_formater' within the 'LearnGo' directory and add a Go file named 'date_formater.go'. 

Copy the code below into the 'date_formater.go' file.”


package dateformater

type Date struct {
Year string
Month string
Day string
}

func (d *Date) Format() string {
return d.Month + "/" + d.Day + "/" + d.Year
}


Step 2: Create a new folder named 'string_formater' within the 'LearnGo' directory and add a file named 'name_formater.go'. 

Paste the code provided below into the 'name_formater.go' file.

package stringformater

type PersonName struct {
FirstName string
LastName string
}

func (rawName *PersonName) Format() string {
return rawName.FirstName + " " + rawName.LastName
}


 Step 3: Add a new file named 'address_formater.go' within the 'string_formater' folder. Paste the code below into the 'address_formater.go' file."


package stringformater

type Address struct {
StreetNumber string
StreetName string
City string
State string
Zip string
}

func (a *Address) Format() string {
return a.StreetNumber + " " + a.StreetName + ", " + a.City + ", " + a.State + " " + a.Zip
}


Step 4: Now, modify the 'my_first_go.go' file and add the following code:

package main

import (
dateformater "LearnGo/date_formater" // import data formater package
stringformater "LearnGo/string_formater" // import string formater package
"fmt"
)

func main() {

fmt.Println("Import date format package!")
dateformater := dateformater.Date{Year: "2021", Month: "07", Day: "01"}
fmt.Println(dateformater.Format())

fmt.Println("Use name format package to format name!")
nameFormater := stringformater.PersonName{FirstName: "Sharad", LastName: "Subedi"}
fmt.Println(nameFormater.Format())

fmt.Println("Use name format package to format billing address!")
addressFormater := stringformater.Address{StreetNumber: "123", StreetName: "Main St", City: "San Francisco", State: "CA", Zip: "94101"}
fmt.Println(addressFormater.Format())
}


Now, you have successfully imported and utilized the functions encapsulated within different packages into the “main” package.  Below is the project folder structure.


In the above example, the code is separated into different packages based on their functionality and use cases. If you are familiar with C#, you can relate the C# namespace to the Golang package.


Module

A Go module is a collection of packages that are related to a set of functions serving a specific purpose. For example, we can create a Go module to support file read and write operations. Any other program or module that needs to read and write files can utilize that module.

Go generates the go.mod file when you run the go mod init command. Execute the below command in the VS code terminal to generate go.mod file.
 $ go mod init learngo

The module file contains 
  • name of the module
  • version of the go required to run the module

Example: Continuation of the previous section (Package)
In this exercise, we will reorganize the above code with multiple modules.

Step 1: Create a new folder named 'main' and move the 'my_first_go.go' file into it. Rename the file to 'main.go'.

Step 2: Run the module initialization command to generate individual modules for 'main', 'date_formater', and 'string_formater'. Make sure to change the directory path before executing the 'go mod init' command.

Commands:

$ go mod init learngo/main 
$ go mod init learngo/string_formater 
$ go mod init learngo/date_formater

Step 3. Edit the go.mod file in the main directory. you can use the below command to edit
$go mod edit -replace learngo/date_formater=../date_formater
$go mod edit -replace learngo/string_formater=../string_formater

Step 4. Synchronize the dependencies 
To synchronize and Add required dependencies of the module, we need to run the command:
 $ go mod tidy
Command result:
go: found learngo/date_formater in learngo/date_formater v0.0.0-00010101000000-000000000000
go: found learngo/string_formater in learngo/string_formater v0.0.0-00010101000000-000000000000
 
If the required dependencies are not being created, then run the below command to create dependencies:

$go get learngo/date_formater
$go get learngo/strig_formater

For specific code or module versioning, update the default created version number with your module version

Step 6.  Run the main module.
command: $ go run .


In the above screenshot, note the content of the 'main/go.mod' file and observe how modules are referenced and used. Additionally, remember the folder structure of the project for better organization of your Go projects.

Congratulations! You have completed part 2 of the Go programming language learning series. You've learned how to structure code using packages, modules, and basic naming standards of the Go language. Follow this blog for more exciting and industry-standard Go programming concepts.


Reference: 

Tuesday, April 23, 2024

Mastering Go: Part 1 - Getting Familiar

Background

This blog series is for software engineers and professionals who want to learn the GO programming language. It's also great for beginners in programming. It's written mainly for people who already know some programming terms. Unlike other tutorials, we focus on practical examples and problem-solving instead of long theories.

Prerequisite

To get the most out of this series, you should have:

  • A basic understanding of programming concepts and the ability to read simple code.
  • Some knowledge of databases.
  • Familiarity with the technical terms used in software engineering.
  • Experience using a code editor, preferably Visual Studio Code.


Environment Setup

Install VS Code

You are free to use the IDE of your choice, but throughout this series and its exercises, we will be using Visual Studio Code (VSCode). VS Code is an open-source code editor that you can freely download and use. The editor supports various programming languages, including Go.


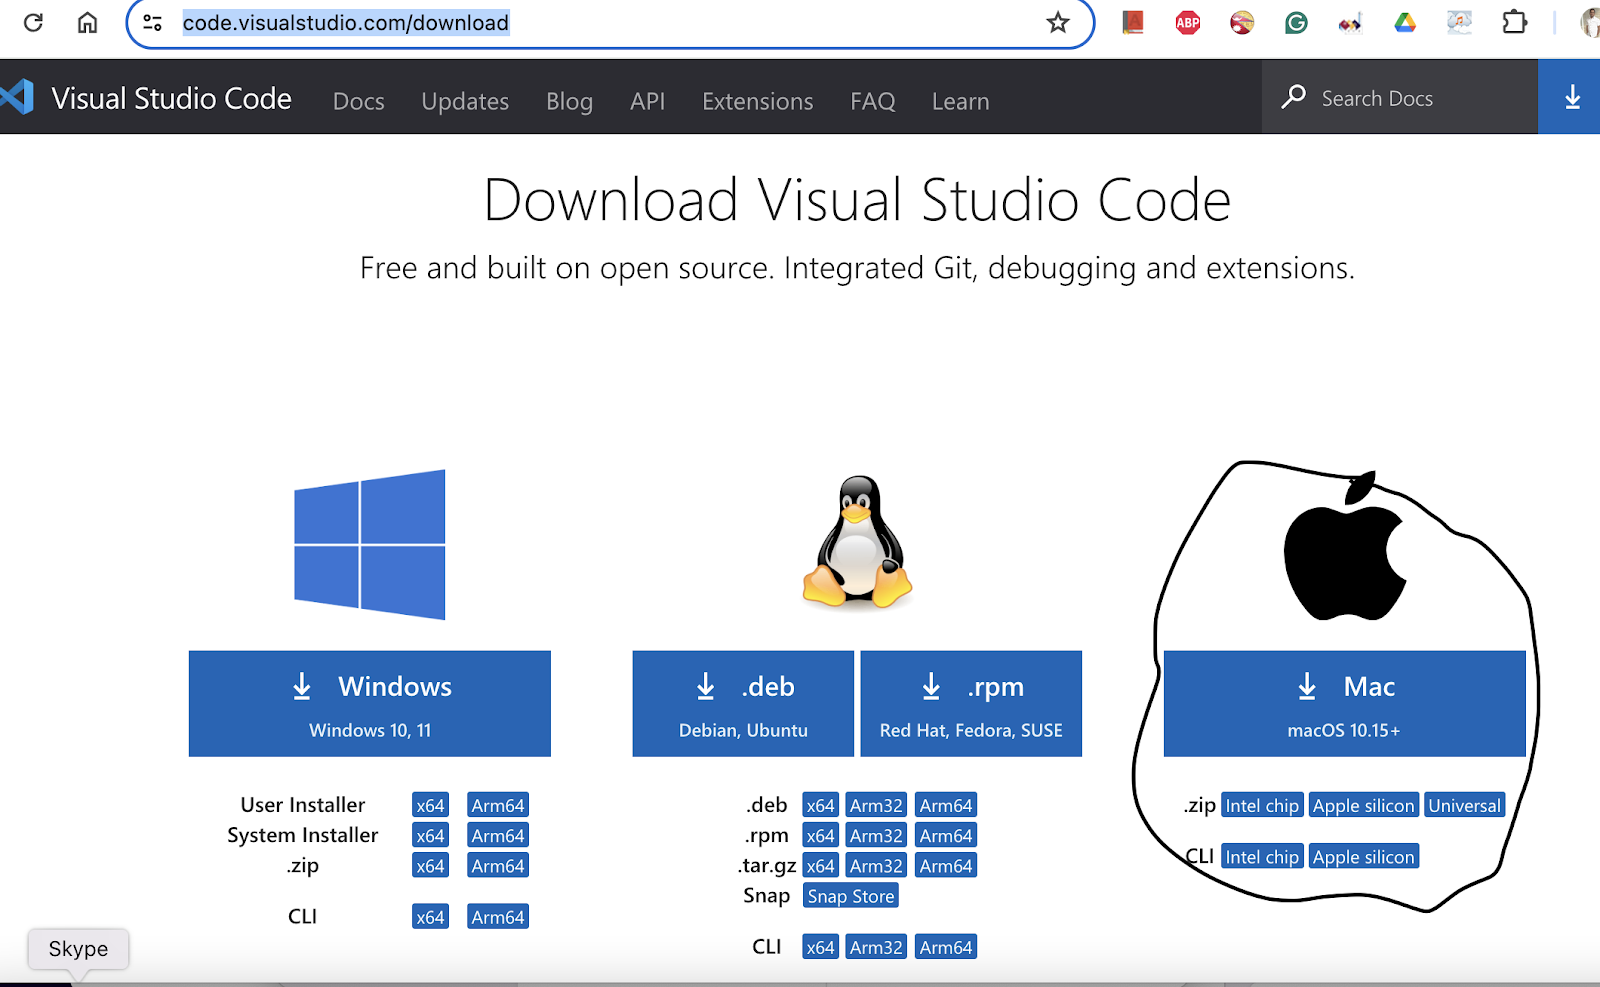
Step 1: Download VS Code from https://code.visualstudio.com/download. Choose the download that matches your machine's operating system. For this series, I'm using MacOS. Download and save the application file (Visual Studio Code.App) for MacOS. 


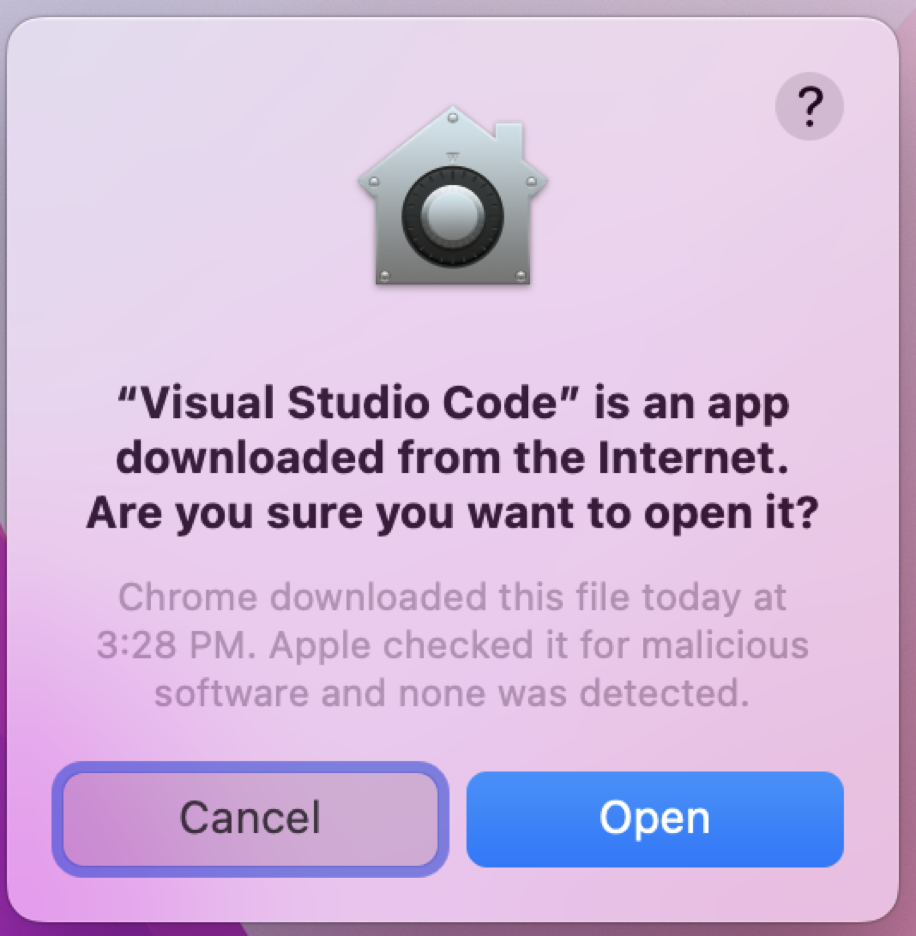
Step 2.  Double-click on the .App file to launch Visual Studio Code. If you see an alert like the one below, click "Open."


Install Go

Step 1: Go to the website https://go.dev/doc/install and download the latest version of Go


Step 2: Double-click on the .pkg file and follow the on-screen instructions.


Step 3: Verify the installed version of Go using the following command in Terminal.

Command: go version 


Step 4: Install the Go language extension in VS Code.

Click on Extensions-> Type "Go"-> Select the Go Extension-> Click on “Install" and re-start the VS Code.


Now, you are all set with the development Environment setup for Go.


Go programming style!

Important things to remember before deep dive into go programming.

Case-sensitive language- Go is a case-sensitive language. Function, variable names starting with a Uppercase letter are considered public, and started with lower case are considered private.

Naming Conventions: Use mixed cap naming convention and avoid using underscore wherever possible. 

  • The package name will be lowercase and a single word. 
  • Source code files are single-word lowercase letters or multi-word lowercase separated by underscore.
  • Constant will be in all caps with an underscore for multi-word
  • Project folder names will be all in lowercase with an underscore for compound word

Semicolons: Go compiler (go lexer) adds semicolons to terminate statements when it finds a newline identifier. We don’t need to add a semicolon to terminate the statement.

Functions:  Go functions can return multiple values like the C# tuple functionalities.

Comments: like C#, single line comments start with double backslash “//” and multiple line comments enclosed with /* ..*/

Interfaces:  it’s a type with a set of method signatures. Go doesn’t support class-based inheritance so, an interface is used to achieve similar concepts. 


Write your first program with GO

Step 1Open the VS Code editor and create a new folder for your code/project.


Step 2. If the alert below pops up, click on “OK”


Step 3. To rename the untitled workspace, go to File -> Save Workspace As -> Provide a name and click Save.


Step 4.  To create a Go module, run the following command:


GO mod init [module name]


Go uses a go.mod file to manage dependencies and imported packages. This file must be within your project's code files to track the modules and packages being used or imported into the project.


Step 5. Add a new file “MyFirstGo.go” and write the below code 


package main


import "fmt"


func main() {

    fmt.Println("Learn programming with Sharad!")

}


Step 6. To run your first-go program, run the command in the VS code terminal


cmd: Go run . or Go run MyFirstGo.go


Congratulations! You've written your first Go programming language code and successfully executed it. Follow this blog for more exciting and industry-standard Go programming concepts.


Reference

1. https://go.dev/doc/tutorial/getting-started

Mastering Go: Part 14 - Messaging with Apache Kafka(Go Implementation)

In this post, we will explore how to implement Apache Kafka messaging in Golang. Several packages are available, and the best choice depends...